When we wrote the blink sketch, we created something called blocking code. In effect, this means that the Arduino will perform a delay, and that is all it does. When the delay period that you set has passed, the Arduino will proceed to do the next thing in the code. However, we can write non blocking code very easily. This involves using something called millis().
Millis() is a function that is basically a timer. When you call millis() in your code, the Arduino stops what it is doing and retrieves the length of time in milliseconds that it has been running. The millis() timer is automatically started whenever the Arduino is plugged in or reset, all you have to do is retrieve the data and use it. We'll go ahead and do that here:
void setup() {
}

void loop() {
  unsigned long currentMillis = millis();
}
Millis() is stored in an unsigned long because an unsigned long can hold over 4 billion milliseconds. One thing to keep in mind is that an unsigned long will not store negative numbers, so care must be taken that millis() does not overflow if you are using millis() in equations. In some cases it is bad if millis() overflows, but for the most part, it doesn't matter.
Now that we have called millis(), lets print it to the Serial monitor so that you can visualize it.
void setup() {
  Serial.begin(9600);
}

void loop() {
  unsigned long currentMillis = millis();
  Serial.println(currentMillis);
  delay(500);
}
For ease of viewing, I included a half second delay, as otherwise it would fill up the Serial monitor too fast.
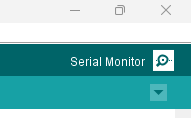
The Serial monitor can be found under the tools tab of the IDE, or you can hit CTRL+Shift+M, or you can click the magnifying glass icon in the upper right hand corner of the application.

Ensure that the serial monitor baud rate is set to 9600. If it is, numbers should start appearing. If nothing is displayed or it is all garbage, check the baud rate.

Make sure that it is on 9600 baud, then reset the board.
You should see something like this:

This is how you can read millis() at a set time. In the next tutorial, we will look at implementing that in some simple code.
Comments